


The first step in water testing is to identify what it is you are testing for. The quality of your water will depend on a number of factors. When protecting equipment and appliances we recommend testing for the following: calcium, magnesium, total hardness, PH, chloride, alkalinity, and total dissolved solids (TDS) content. Each of these will have a profound effect on the taste, smell, hardness, and mouthfeel of your water, as well as the life of your appliances and equipment.
Once you have identified all of the fields that are relevant for you to test for, the level of testing should be decided. There are four leading methods of testing your water: water sample test strip kits, titration test kits, photometer test strip combination, and laboratory testing.
1. WATER SAMPLE TEST STRIP KITS
These kits comprise of test strips that when exposed to water, cause a change in colour in accordance to a colour chart provided with the kit. Matching the colour on your strip to the closest colour represented on the card is critical to the quality of the data that you want to use.
Pros: This method allows you to have a basic understanding of your water quality at a rudimentary level, for a low-investment cost.
Cons: The results are usually only correct to a figure of +/- 10 parts per million (ppm) providing that the strips are in-date and not exposed to extreme weather events. This method also uses single-use test strips.
2. TITRATION TEST KITS
The titration test method provides improved accuracy over most test strip kits, and is similar to what is used by most pool store operators. You simply fill a small vial with water up to the prescribed mark on the side, then add the chemical reagent provided in the kit. The number of individual drops it takes from the applicator for a colour change to occur will tell you the level of chosen contaminant in your water source.
Pros: This method is suitable for people that have a number of sites to check for the same contaminant as it is not a single use item. It will provide a basic understanding of the sites water for a reasonable price.
Cons: The results are usually only correct to a figure of +/- 5ppm to 10 ppm providing that the strips are in-date and not exposed to extreme weather events.
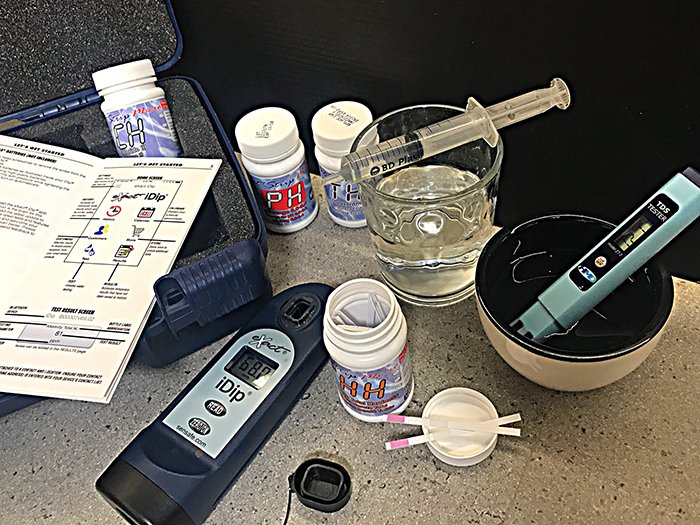
3. PHOTOMETER AND TEST STRIP REAGENT COMBINATION
The use of a photometer and test strip reagent combination such as an iDip gives the end user the power to easily monitor their water quality. With over 35 individual tests available it provides an accurate reading of key Australian water contaminants at a fraction of the cost of laboratory testing.
Pros: This is a device that can be continuously used for years and will only require the strips to be replaced once used. Accuracy is within 1.0 ppm and it is portable, waterproof, and iPhone compatible, allowing technicians to take it anywhere it is required.
Cons: It will require an upfront investment of a few hundred dollars.
4. SENDING YOUR WATER TO A LABORATORY
Once a 500ml sample has been taken, this method will allow NATA accredited professionals to analyse your water source within a controlled laboratory environment. Each of your chosen contaminants will be measured and reported within a structured document that can be used when in discussions with equipment suppliers, local councils, and water authorities. A professional report such as this is often recommended for individuals and businesses that are experiencing unusual water issues or about to invest in significant equipment purchases.
Pros: This method will provide you with a detailed analysis of your water source and be correct to a +/- 0.02 ppm level.
Cons: Each report will generally be in the region of $60-$120, depending on the provider of the service.
Each of these options will provide a level of report quality and associated costs per test. For more information or assistance with choosing the right water testing method for you, send our team an email at sales@bomborasupplies.com.au or give them a call on 1300 724 249.